The tutorial below will guide you step by step illustrating how to use your body properly throwing a pot on the wheel. Always start small. This demo is with a 3 lbs clay and starting with 2 lbs will be a wise choice if you are a beginner.
This video is a slide show of all the illustrations below
Step-by-step Images
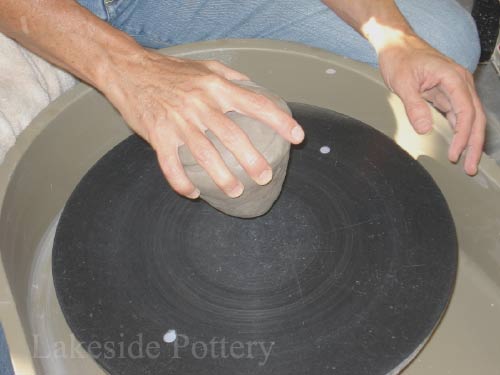
1. Place clay on bat firmly with tip pointed down
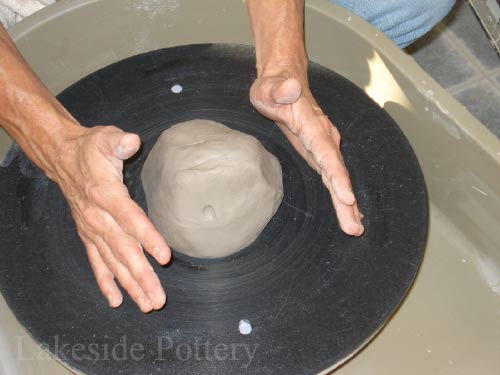
2. Tap to center with dry hands while wheel is turning slowly
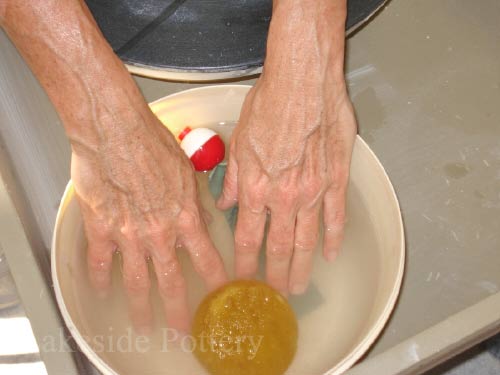
3. Get your hands wet
4. Get your hands wet
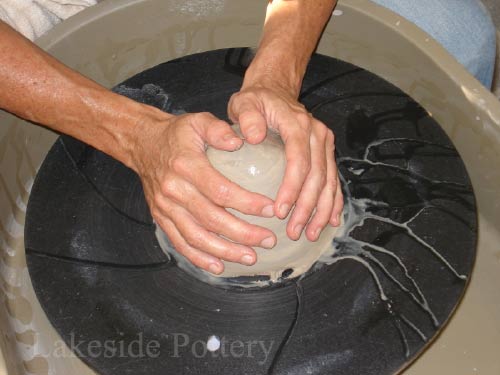
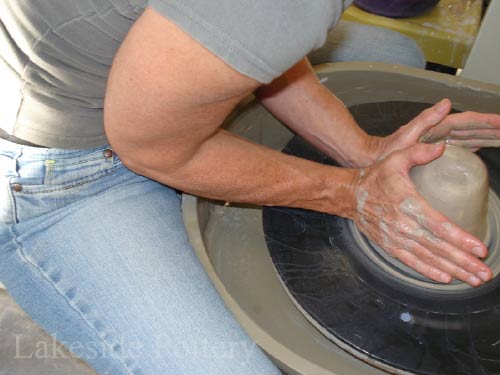
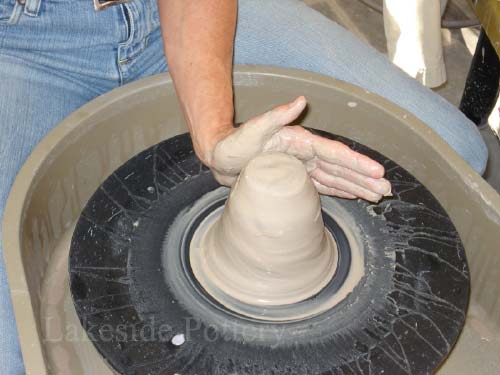
5. Push clay forward as shown (plow forward). Wheel speed - fast
6. Sit close to the wheel & anchor your elbows tightly against body
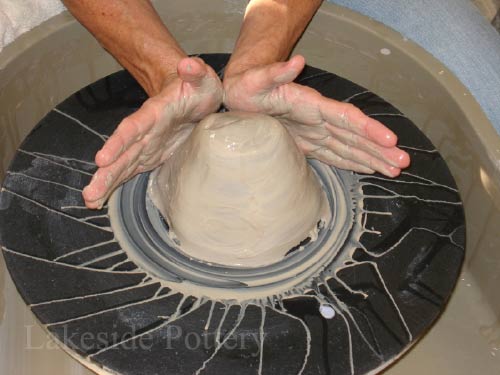
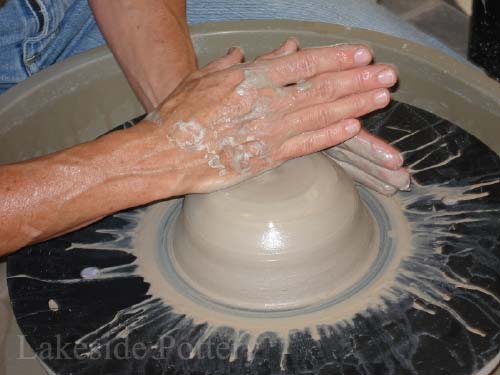
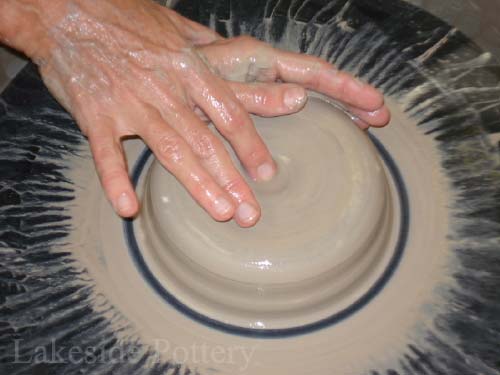
7. When clay complies (feels calm), squeeze clay and cone up
8. Level top of cone with thumbs pressure
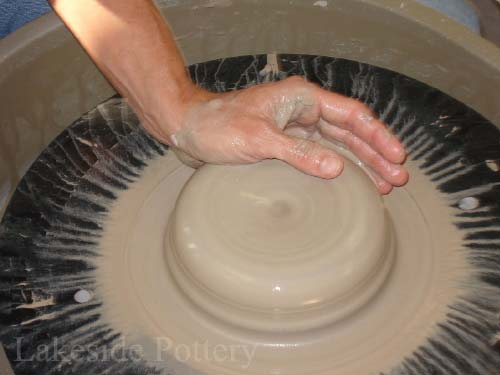
9. Both hands are touching and elbows are against body
10. Coning down - place left hand as in previous step securing elbow into body
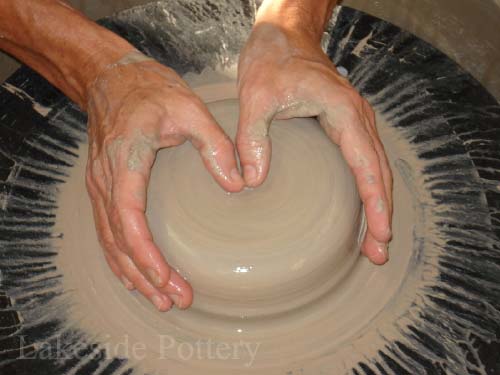
11. Place right hand on top of cone while interlocking with left hand
12. Right hand pushes down. Left hand pushes forward. Wheel speed - fast
13. Right hand touches only half of the top surface from center to edge.
14. Left hand smooths outer edge of clay with palm
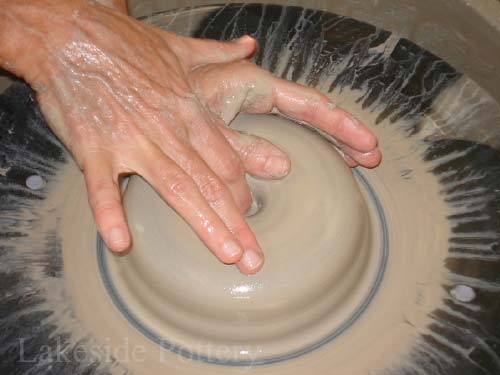
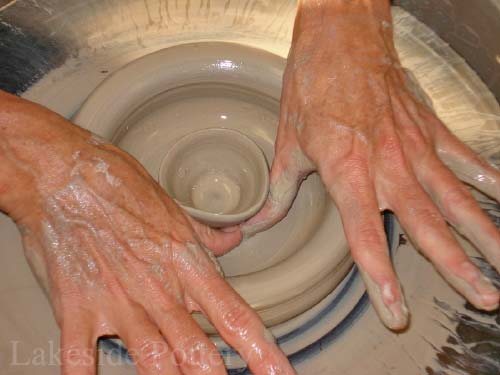
15. Slow wheel a bit. Place thumbs in center and mark the center
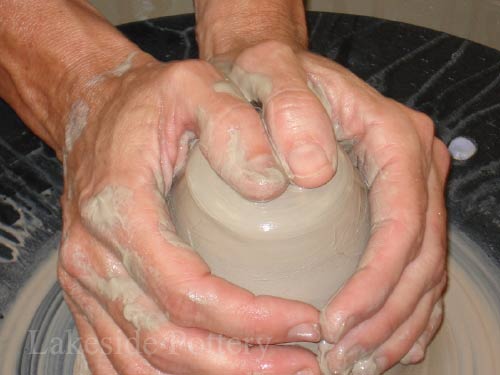
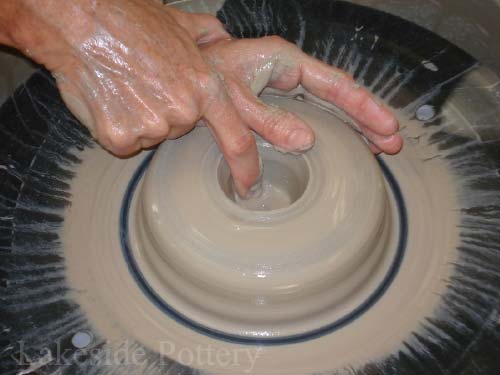
16. Decisively, make a hole in center - both hands are touching each other
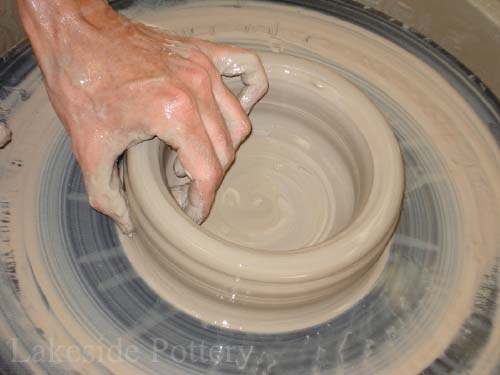
17. Leave enough clay for pot's bottom
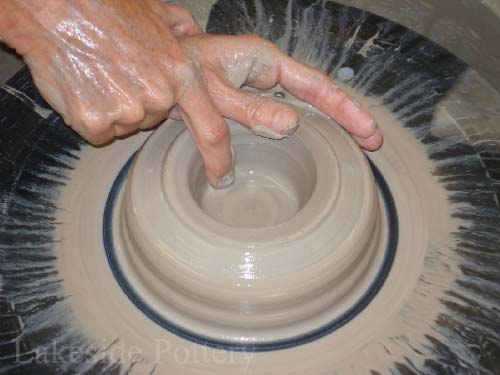
18. Pull clay out - both hands are touching each other and clay is wet
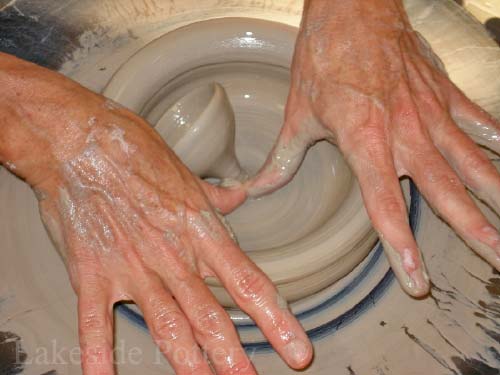
19. Move clay evenly and keep constant distance from bottom for flat surface
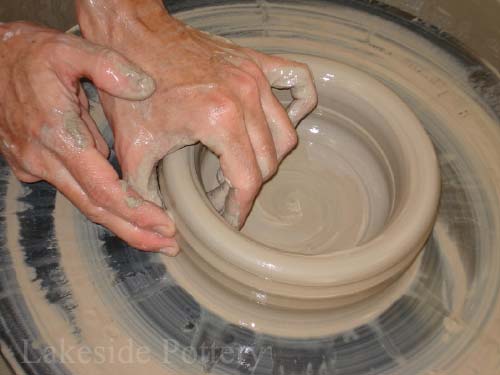
20. Smooth all unevenness. Make sure clay is not too dry
21. Do not overhang clay . When finished pulling, let go gradually to stay in center
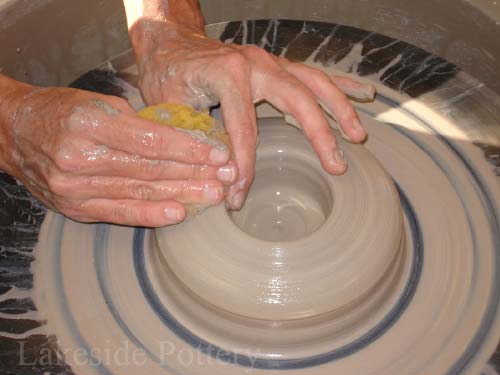
22. If bottom too thick or uneven pass thumbs on bottom as shown
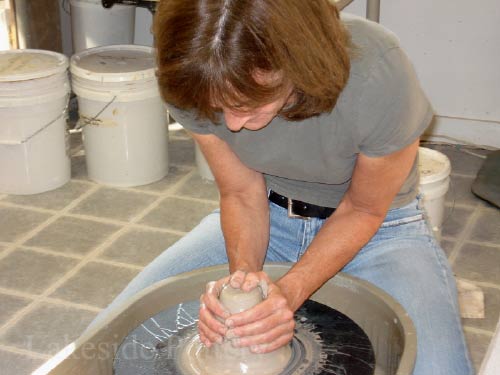
23. Apply constant pressure on bottom. Move slowly towards center. Wheel speed - medium
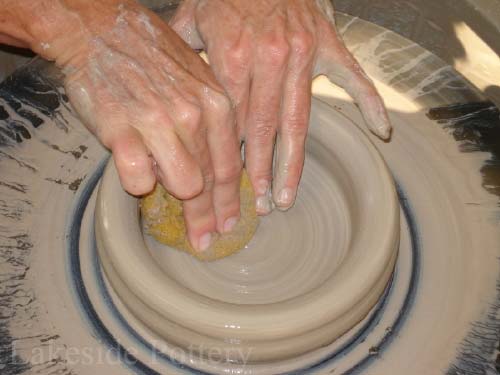
24. Take off extra clay
25. Compress bottom to avoid "S" cracks
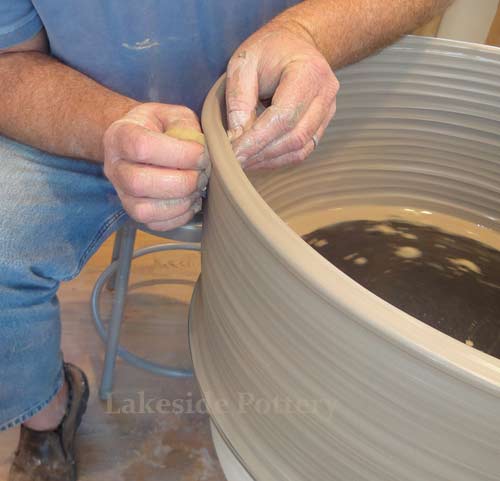
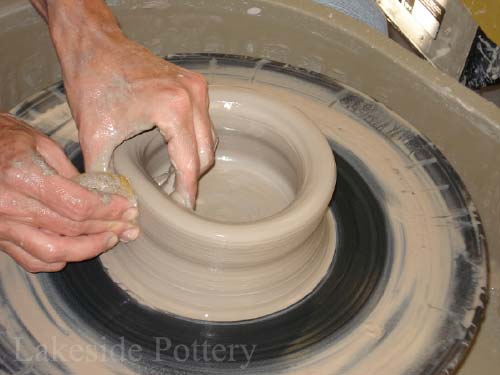
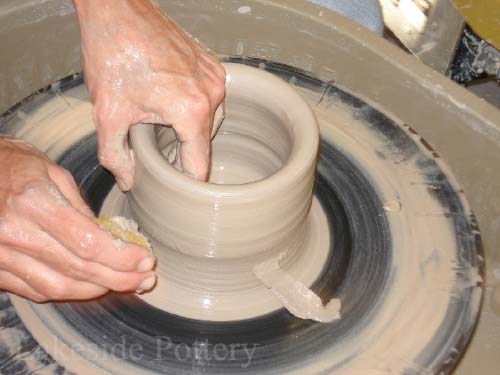
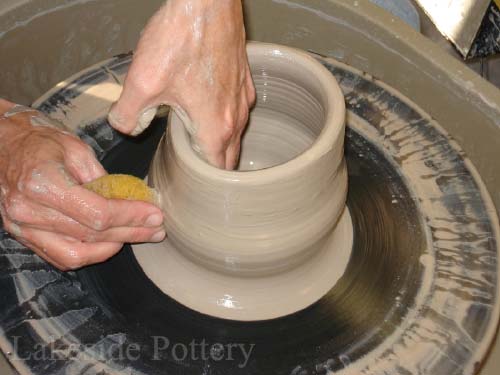
26. Raise the wall - squeeze clay w/ fingers using a sponge. Use fingers tips only. Hands touching
27. Note that the thumb is helping in squeezing clay
28. Contact clay with finger tips to avoid unnecessary friction
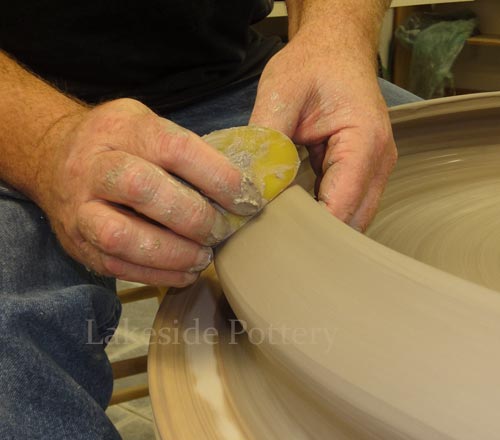
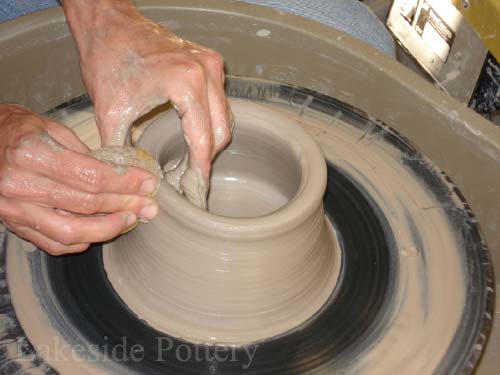
29. The pull - squeeze and lift. Don't be afraid to be a bit aggressive. Clay needs to be wet
30. Smooth the rim at end of each pull
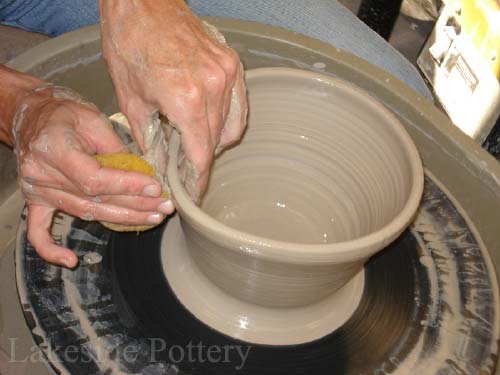
31. Second pull - stay on bottom until you get desired thickness
32. As the wall gets thinner, use less finger surface contact ....
33. .. to avoid too much friction and possible torquing
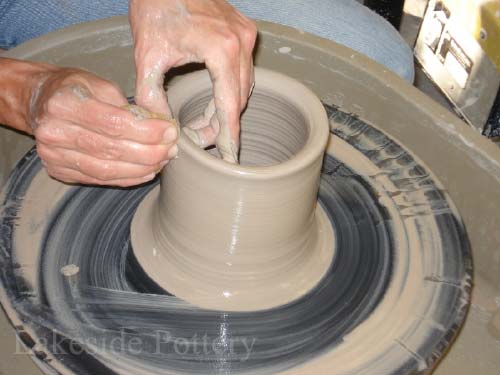
34. Even wall of cylinder
35. Even cylinder's rim
36. Collar top portion of cylinder in and even the rim
37. Shaping - Push inside of cylinder out while outside hand gently supports clay
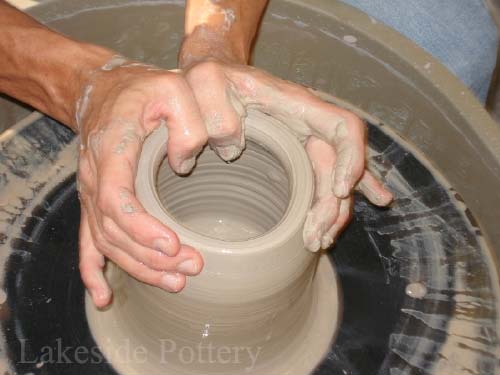
38. Touch hands as soon as able for stability
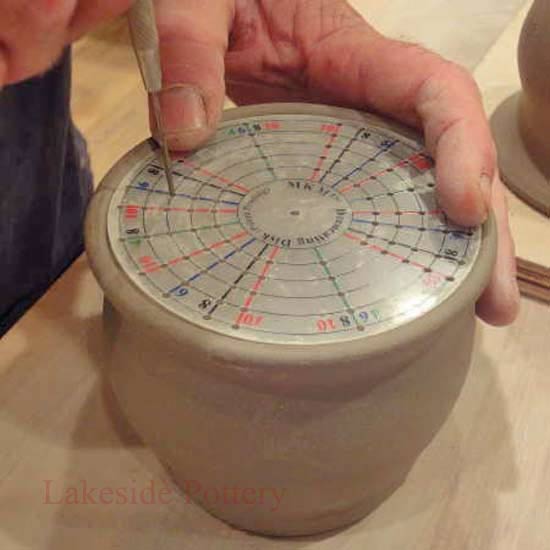
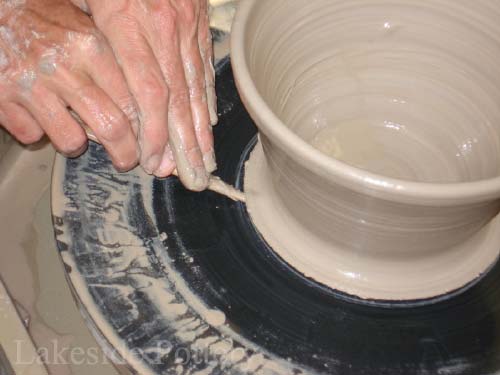
39. Note that only finger tips are touching the pot
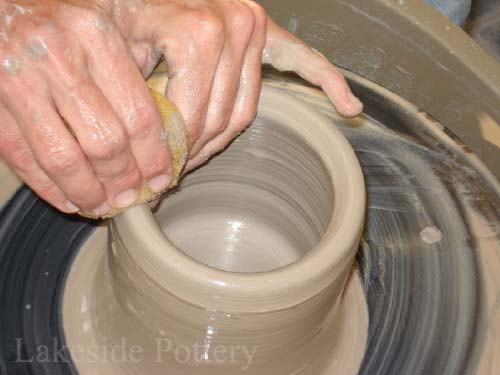
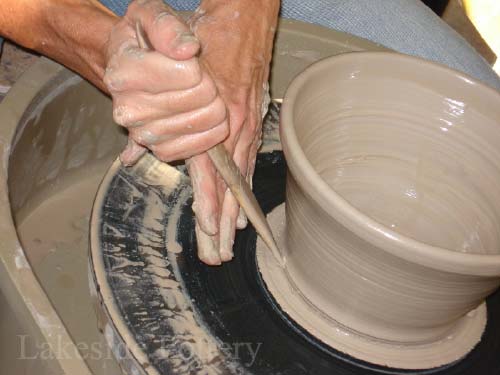
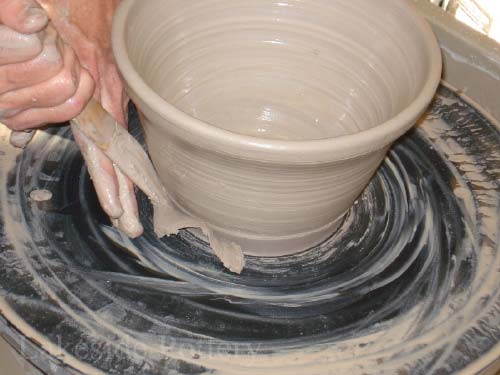
40. Smooth rim with Chamois
41. Clean bottom with wooden tool. Sharpen Wooden tool every so often
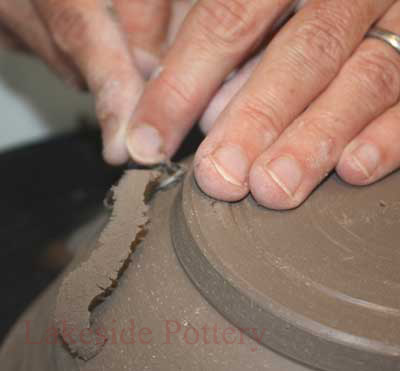
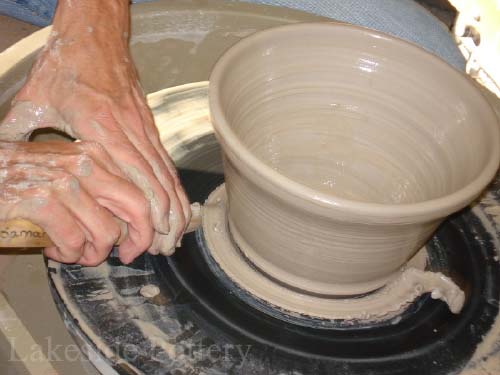
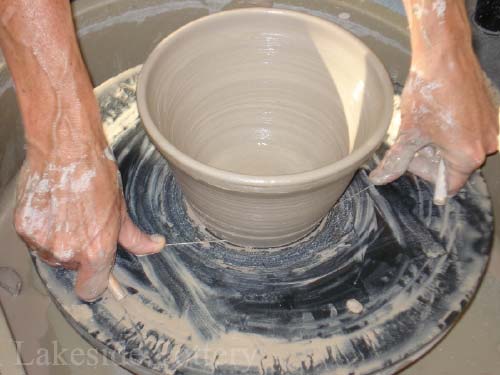
42. Under cutting -Clear clay from bat for easy access to the cutting wire
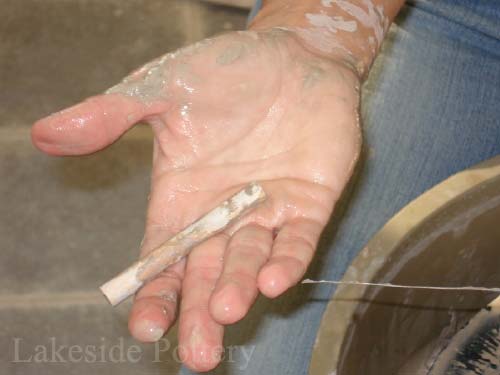
43. Clear as much clay as possible to minimize trimming effort later
44. Watch the angle of the wooden tool.
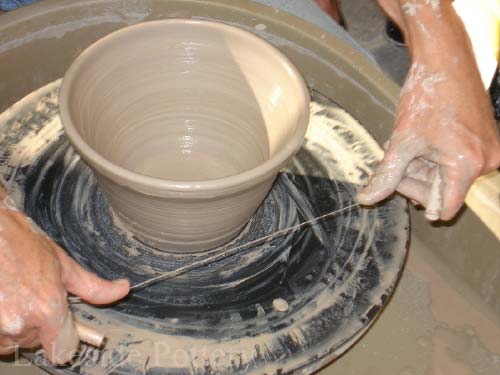
45. Hold the cutting wire as shown
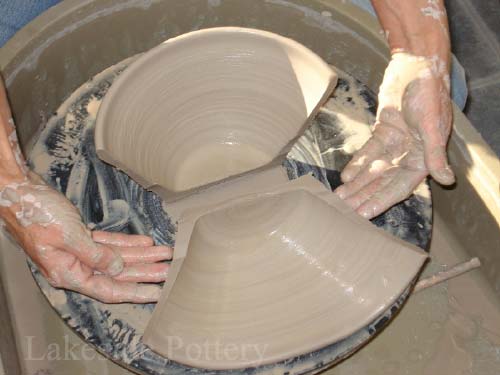
46. Push the wire against the bat with thumbs or index fingers
47. Run wire all the way through keeping it tight and straight
48. If throwing for practice, slice pot to view wall uniformity