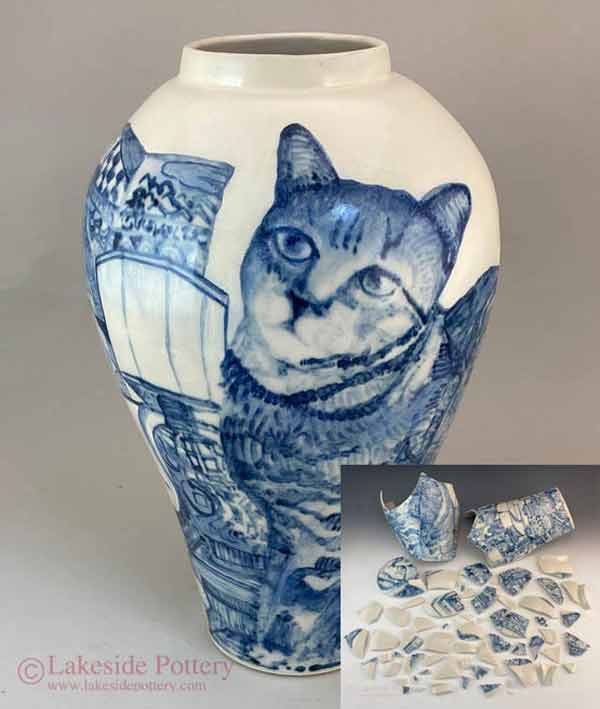
Many assume that a vessel or statue with a clean break will look flawless once it's simply glued back together. In reality, the thin layer of adhesive slightly widens the break, causing visible dark lines that reveal the repair.
Gluing alone accounts for a small fraction of the effort needed for a seamless restoration. Often, chips or missing segments must be carefully filled or sculpted using compatible materials such as fillers. The surface then requires meticulous smoothing to eliminate any physical traces, followed by expert color and finish matching to blend flawlessly with the original piece.
Ensuring long-term material compatibility is crucial, without it, staining, cracking, or poor bonding may develop over time. Using archival-quality materials and processes guarantees durable, lasting repairs that can endure for generations.
Why Some Repairs Invisible and Others Not?
Not all ceramic or pottery repairs can be hidden from view. The visibility of a repair depends on factors such as the type of material, the nature of the damage, surface complexity, and the techniques used. Some repairs can be made nearly invisible, while others will always show signs of restoration, even when expertly done.
1. Material Transparency and Light Reflection
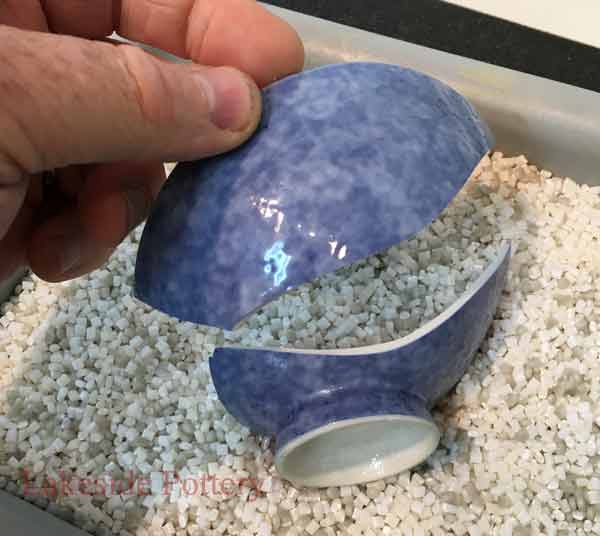
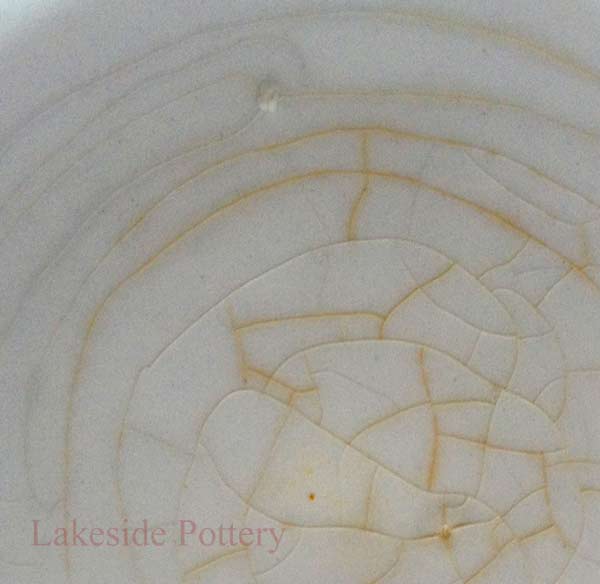
Materials like porcelain or bone china are often semi-translucent. This means light passes through them, creating a subtle glow or depth. When cracks or losses are filled, the new materials typically block or scatter light differently, making even a flawless surface repaint appear slightly off. In contrast, dense, opaque ceramics reflect light uniformly, allowing for better camouflage of repairs.
2. Color and Surface Complexity
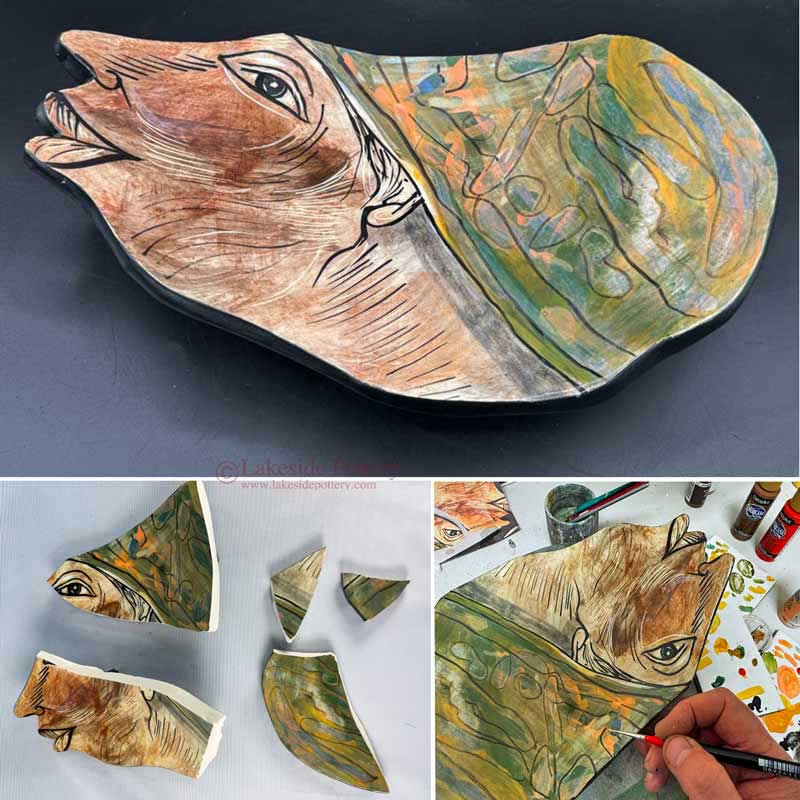
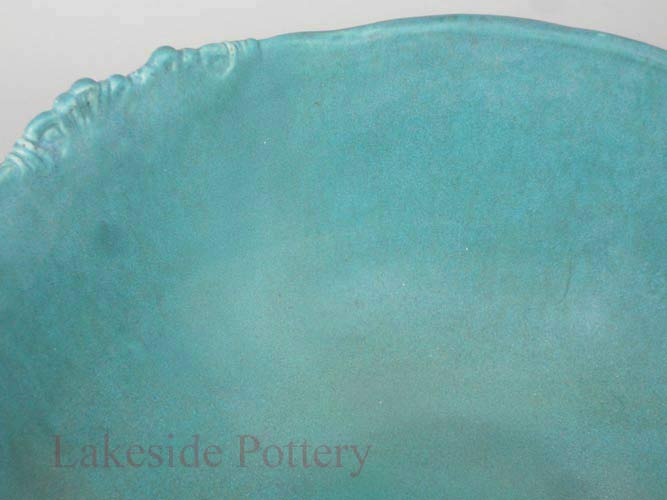
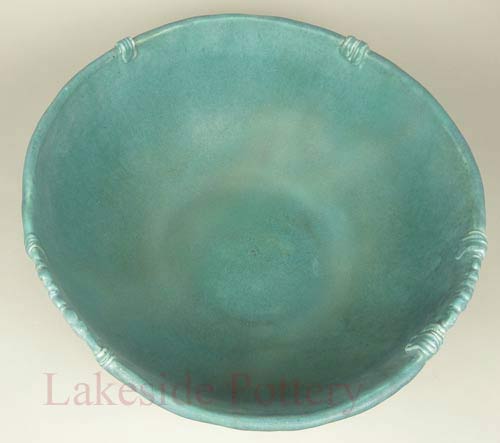
Simple, solid-color glazes are easier to match. However, pieces with intricate decoration, metallic glazes, or color gradients pose greater challenges. Any slight variation in tone, gloss, or texture, even if imperceptible at first, can reveal the location of the repair once viewed in certain lighting conditions.
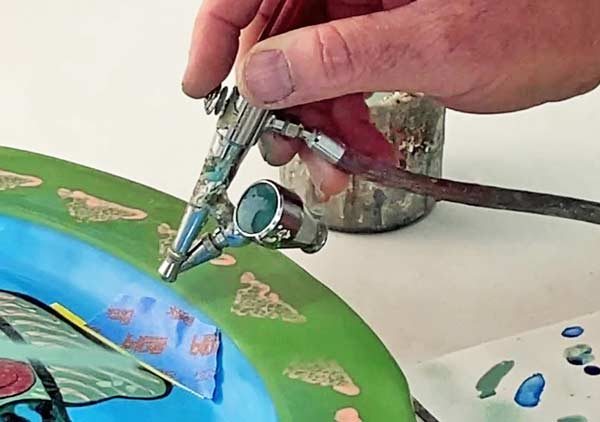
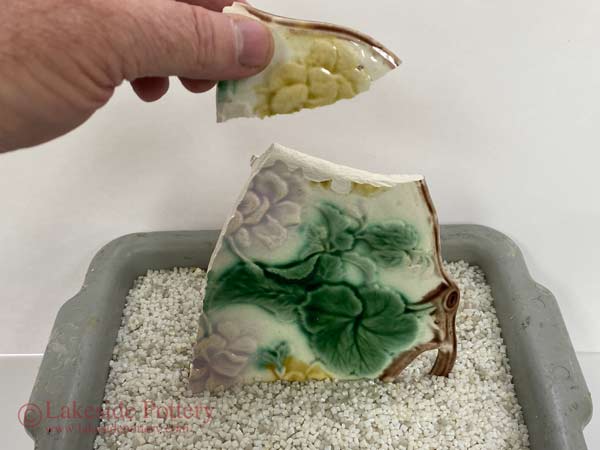
This platter example, shown in the before-and-after images, illustrates a complex restoration involving multiple breaks traveling through a wide range of colors and subtle color transitions. The surface includes both matte and glossy finishes, along with textured areas. See this video tutorial of a similar project demonstrating the complete process, from mending and filling to color matching and final glazing.
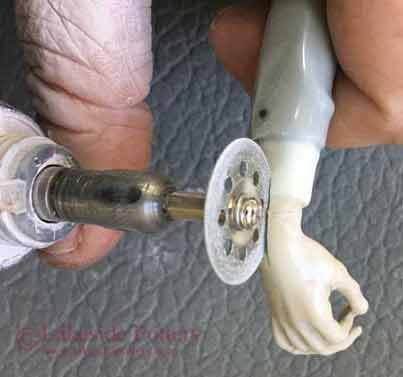
3. Break Pattern and Fragment Fit
Clean breaks that allow perfect re-alignment are easier to hide. But jagged or shattered areas introduce tiny gaps or material loss, which require fillers. Even the best fillers don't behave exactly like the original ceramic, especially under magnification or strong light.
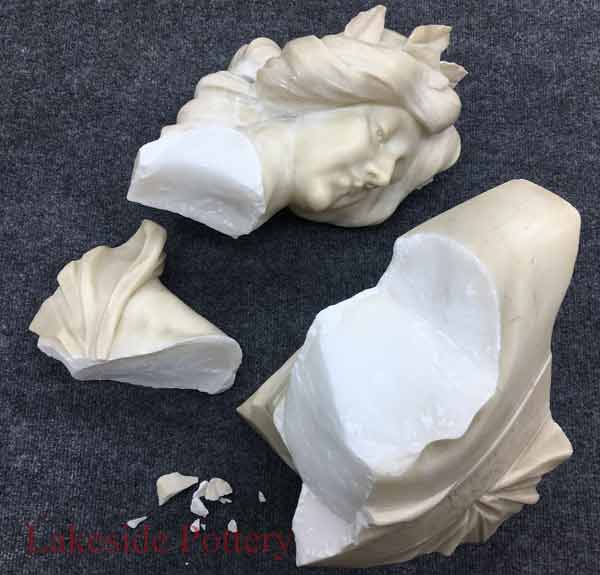
4. Type and Location of Damage
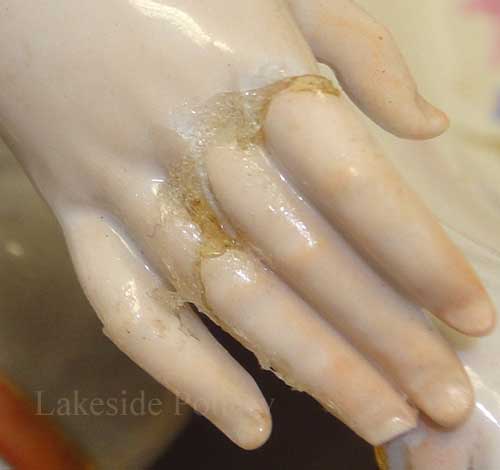
Repairs on smooth, low-profile areas are easier to disguise than those on sculpted, detailed, or highly visible surfaces like faces, edges, or decorative ridges. Surface contours amplify imperfections, and restorers must sculpt and blend with extreme precision to achieve invisibility.
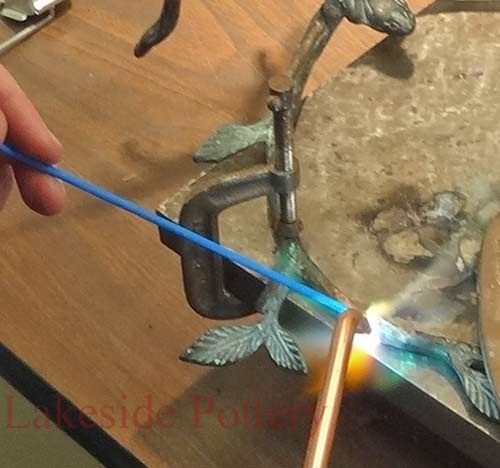
5. Tools, Materials, and Skill
Invisible repair demands advanced tools like micro-sanders, high-precision airbrushes, custom-tinted pigments, and cold glazes. Equally important is the restorer's patience and experience. DIY methods using craft store supplies rarely achieve seamless results and often age poorly, highlighting the importance of professional techniques.
Whether a repair becomes invisible depends on a combination of material properties, the extent of damage, and restoration expertise. At Lakeside Pottery, we assess each piece individually and apply techniques tailored to maximize beauty while preserving authenticity. In some cases, visible repair lines are unavoidable, but when conditions allow, we aim for a flawless, museum-quality finish.
Complete Pottery Repair Quick Video - Speeded up Version
Many people assume that a piece with a clean break will look flawless once it's simply glued back together. In practice, however, the thin layer of adhesive slightly widens the break, creating visible dark lines. To achieve a truly invisible repair, a careful, multi-step process is essential, combining structural precision with artistic skill.
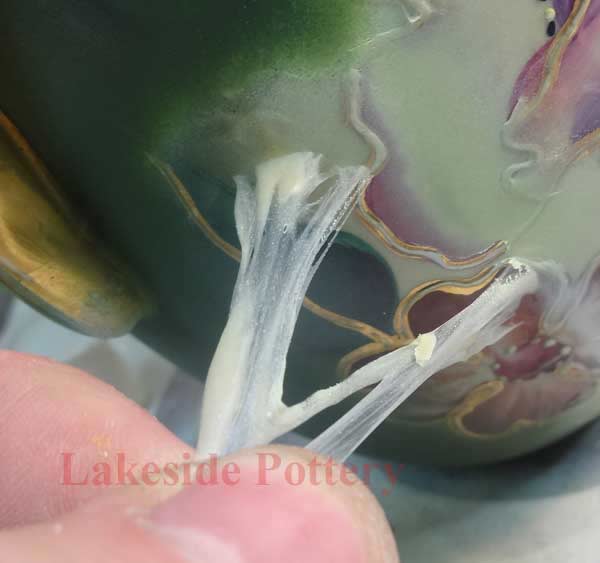
1. Material Choice: Building a Strong, Compatible Foundation Invisible repairs start with using the right materials. After cementing the broken pieces, gaps or uneven seams are filled with a fine, sandable filler epoxy designed to match the ceramic's physical properties. Choosing adhesives and fillers that adhere well, cure clear, and age gracefully is critical for long-term invisibility. This foundation supports every other step, poor materials can lead to cracking, discoloration, or texture mismatches over time.
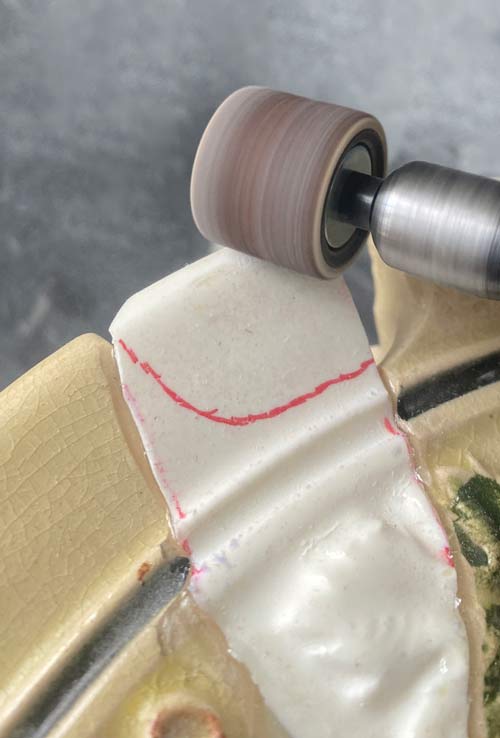
2. Filling and Surface Smoothing: Erasing Physical Traces Once the filler epoxy cures, the repair is sanded smooth and feathered flush with the surrounding ceramic surface. This is where the physical trace of the break begins to disappear. We inspect the repair under black light, revealing imperfections invisible to the naked eye. See mending | Filling | Sanding Lesson
If needed, a second filler layer is applied and sanded to ensure perfect continuity. The goal is a seamless surface that reflects light just like the original, with no bumps, dips, or visible seams. This precise smoothing is critical, even the best color matching won't hide physical irregularities.
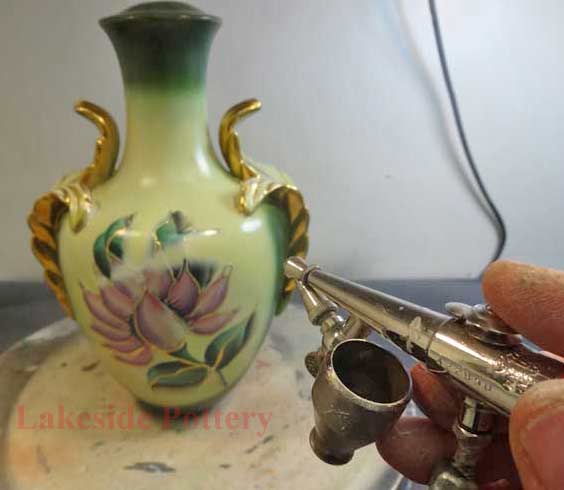
3. Color Matching and Base Airbrushing: Blending the Repair Seamlessly Next, a custom-mixed base color is airbrushed over the repaired area. This step conceals the filler and blends the repair with the original glaze or paint, restoring any surface damaged during sanding. See Painting Lesson
Key techniques include:
Matching not only color hue but also gloss, translucency, and tone
Using thin, translucent layers to build up a natural look
Creating a consistent background color that flows seamlessly into surrounding areas. This stage lays the groundwork for restoring intricate surface details.
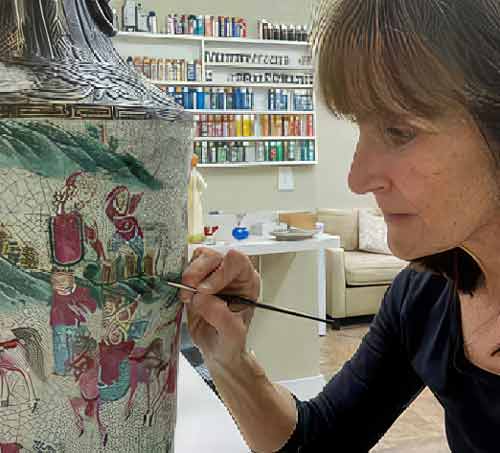
4. Restoring Surface Details: Bringing Back Original Decoration If the original piece has decorative elements, painted designs, textures, gilding, these are often lost or obscured by repair work and base coloring. These details are painstakingly recreated by hand using fine brushes or airbrush techniques.
The complexity of the original decoration determines the time and precision required. Restoring these details ensures the repair is not just invisible but true to the piece’s original beauty.
5. Applying the Cold Glaze Finish: The Final Invisible Layer The last step is applying a cold glaze finish matched perfectly to the surrounding sheen, whether matte, satin, high gloss, or anything in between. Achieving this requires using the correct mix of matting agents to precisely adjust the gloss level. This protective coating enhances the seamless appearance, restores surface depth, and improves longevity, ensuring the finish blends flawlessly with the original ceramic. See Cold Glazing Lesson
By combining careful material selection, precise structural repair, expert color blending, detailed decoration restoration, and finishing glaze application, we make repair lines virtually invisible, even under close inspection.
The Key to Proper Repair: Two Examples
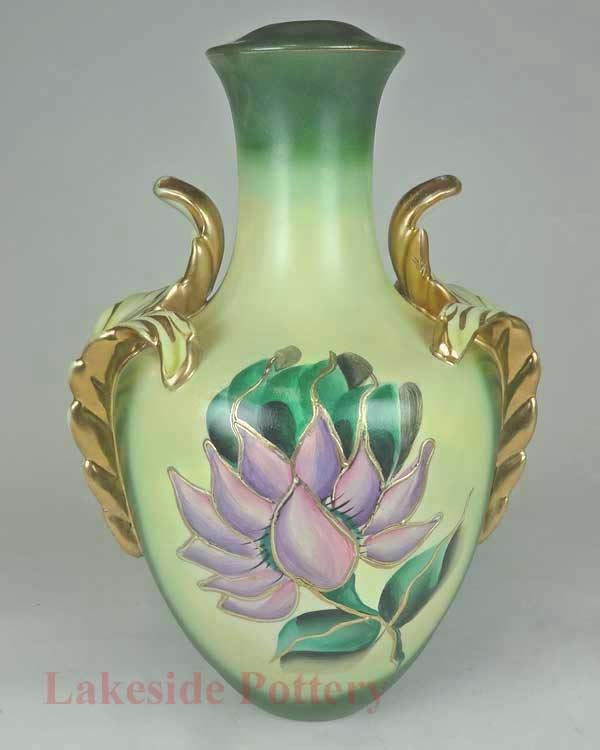
Case 1: Hiding Repair Lines With Simple Glaze
When break lines do not intersect intricate painted details, the repair process can be completed more quickly and cost-effectively. A simple glaze application is often sufficient to conceal the seams and blend the repair with the original surface
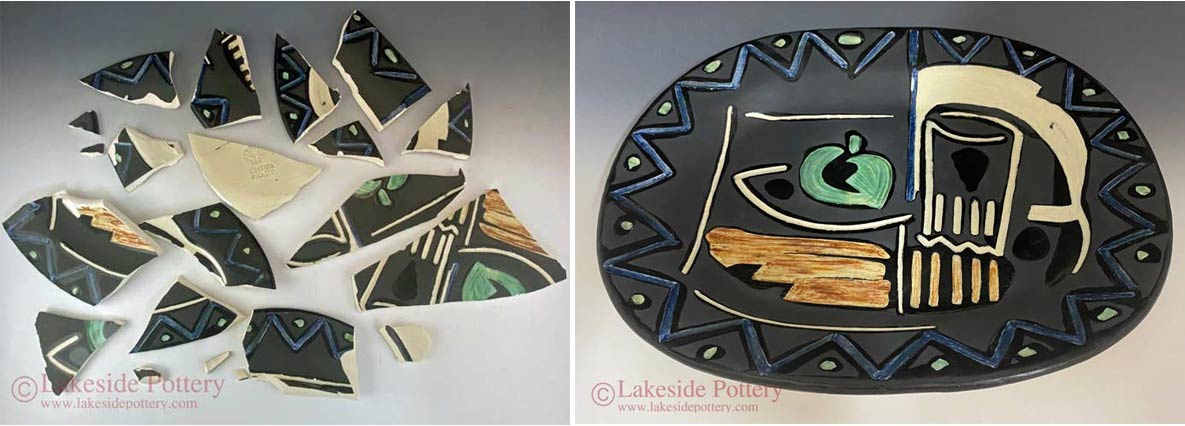
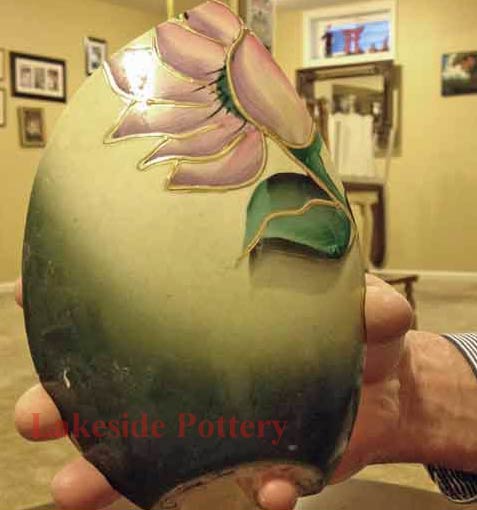
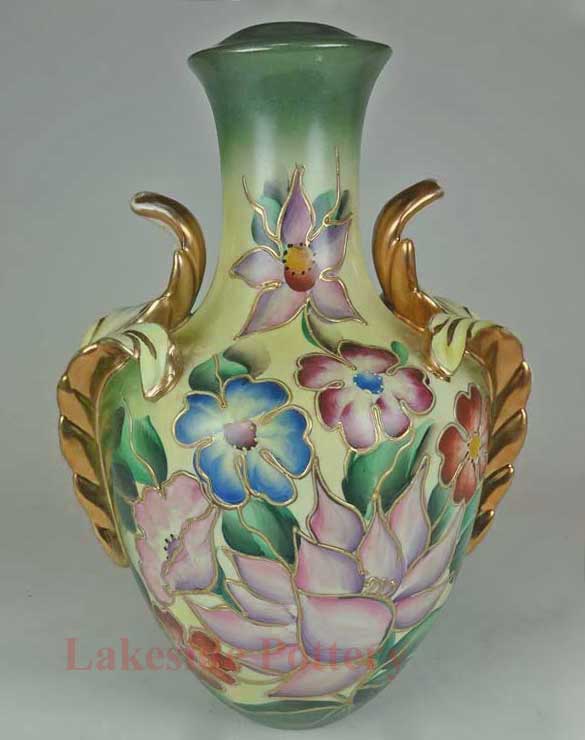
Case 2: Hiding Break Lines With Painted Glaze Details
When break lines pass through areas with complex decoration, restoration requires precise hand-painting and multiple layers of glazing to replicate the original design. This level of detail significantly increases both the time and cost of the repair.
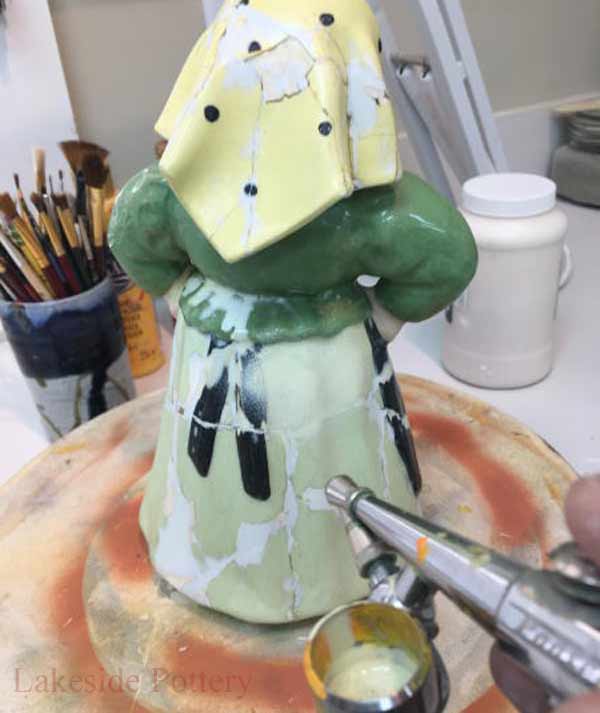
Case 1: Hiding Repair Lines With Simple Glaze
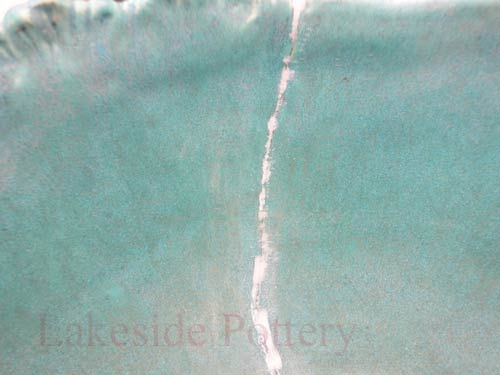
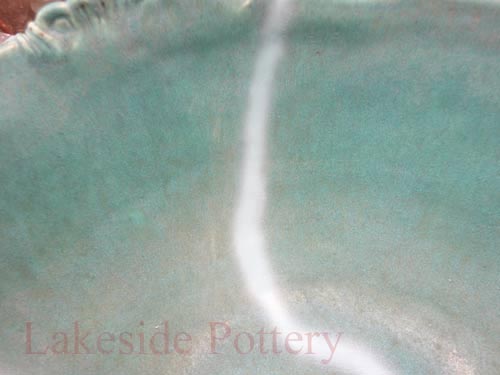
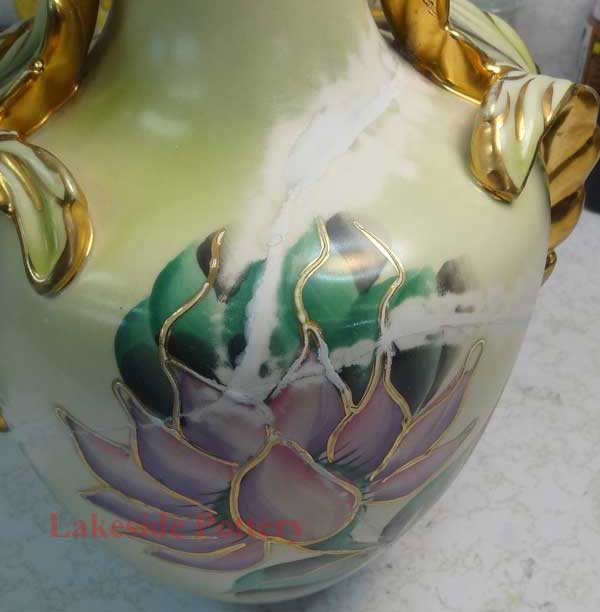
Surface with repair line ready for painting
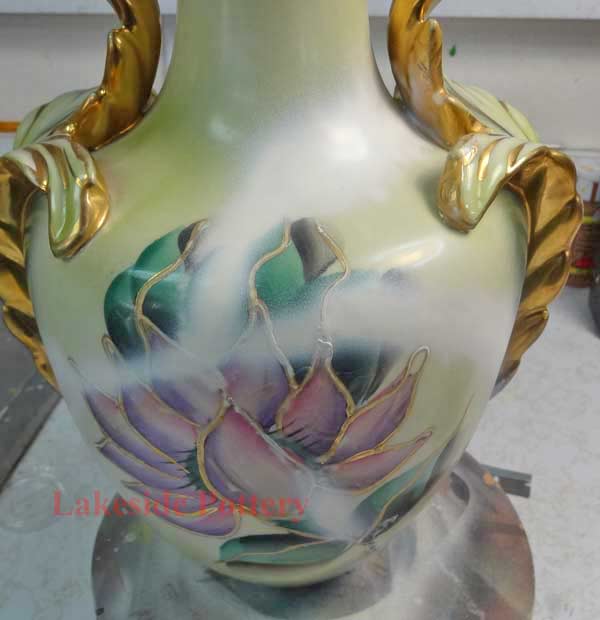
Clay color airbrushed over repair line
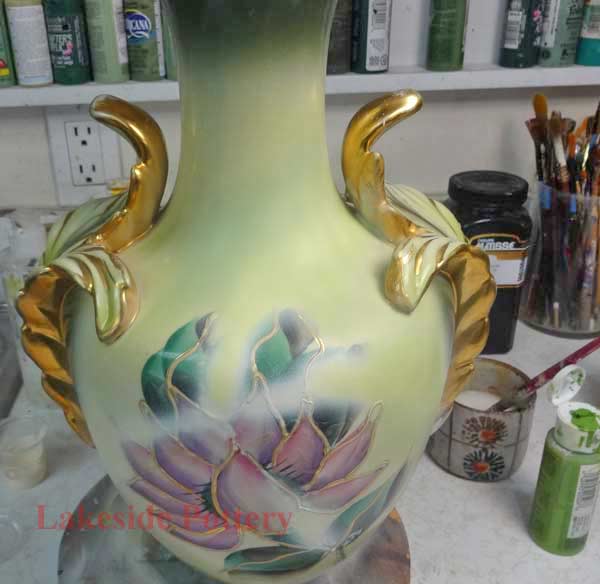
Turquoise elements painted with airbrush
Green elements painted with airbrush
Gray elements painted with airbrush
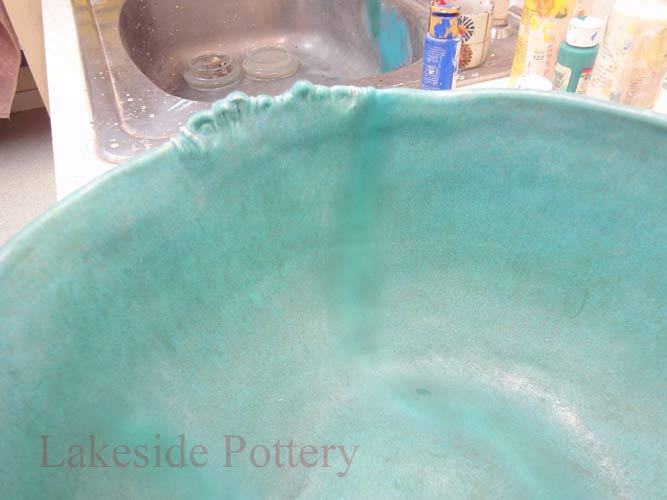
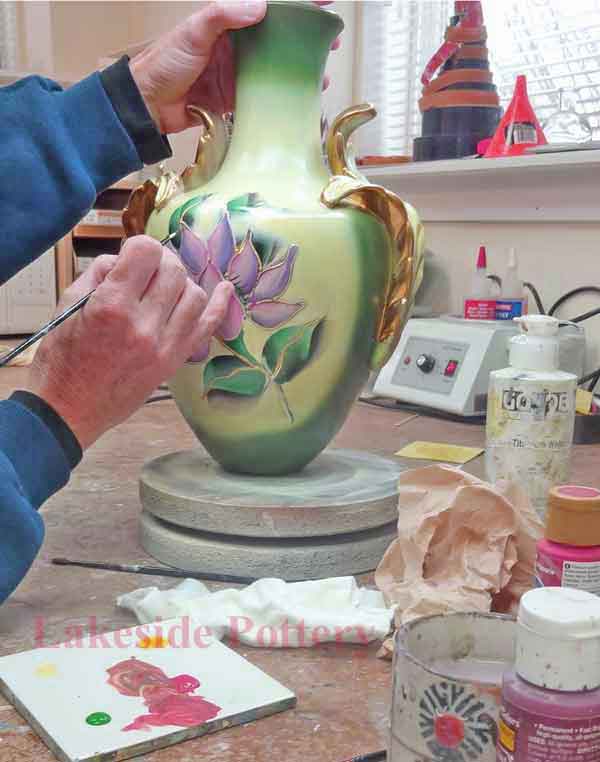
Repaired areas after matte glaze - ready!
Case 2: Hiding Break Lines With Painted Glaze Details
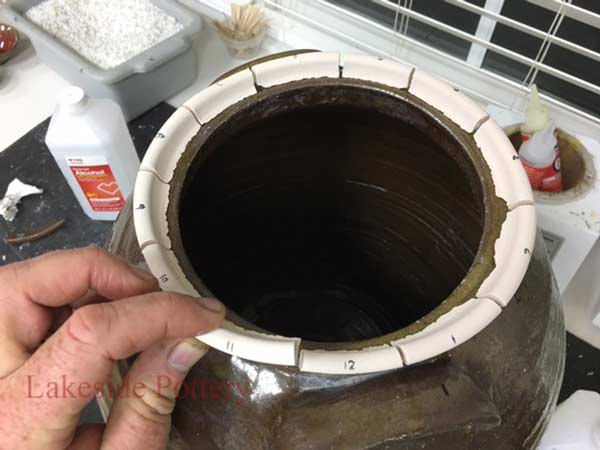
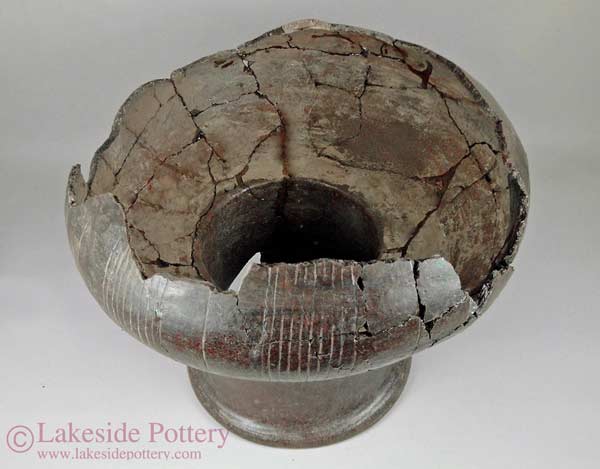
Broken ceramic lamp
11 broken segments
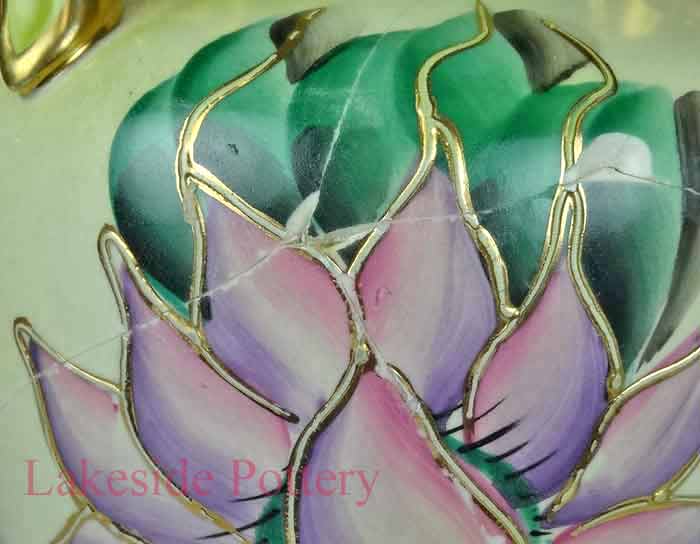
Repair lines visible after cementing
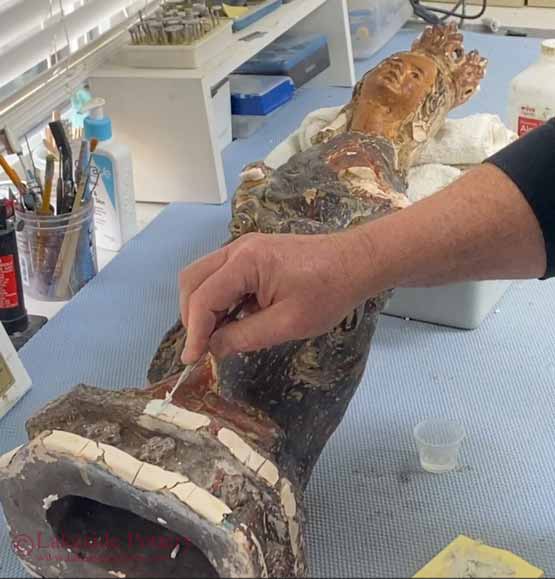
Repair areas are missing more details after ensuring a smooth and continuous surface
Clean surfaces, protect undamaged paintings with latex and airbrush clay color to hide worked areas. Cure at 160 degrees.
Airbrush background colors and shades of colors (4-6 layers). Cure at 160 degrees.
Hand paint all missing details including gold. Cure at 160 degrees and apply cold glaze with the proper matching sheen
Remove protective latex - pull at a 90-degree angle to ensure fresh paint does not pull
Airbrush glaze with slight texture to ensure proper bond of the next hand painting step. Cure at 160 degrees for 36 hours.