GLAZES - Overview
Glazes can be thought of as a glass coating, either clear transparent or, with the addition of a metal in any of several forms, in a rainbow of colors. They may also be glossy or matte, translucent or opaque, smooth or even textured. The effects are limitless depending on formulation, application and combinations. Never be afraid to try new combinations or techniques but always test first.
Glazes are formulated as a mixture of ground, powdered ingredients which, by their nature, do not dissolve but are merely suspended in water. Glazes do not ‘go bad’ with age but, because different ingredients tend to come out of suspension at different rates, it is critical that the batch or bottle be mixed thoroughly before each application. This may be done with a spatula, an electric mixer or simply by shaking a bottled glaze, but one must be certain there is no glaze left caked on the bottom.
Good glazing begins with properly fired and clean bisque. Single firing (glaze applied to greenware) is not recommended with today’s glazes. Properly fired bisque has been fired to a temperature high enough that organics and water have been driven off and certain other reactions have occurred but not so high that the porosity necessary to ‘hold’ the glaze on (both prior to and through the firing) has been eliminated. Technically, this would be different for different clays but Cone 010 to Cone 02 is a reasonable range. Generally, low fire (Cone 05-06) glazes on low fire clays should be bisque fired 2 to 3 cones hotter (Cone 04 to 03) than the recommended glaze firing temperature. Wetting overly porous bisque will reduce the porosity and help in getting an even glaze application. If bisque is not porous enough due to over firing or if additional glaze needs to be added to an already glazed and fired piece, heating the piece in the oven or on top of the kiln before applying the glaze may help by opening the pores.
Glazes are not "sticky" but adhere to bisque before firing by penetrating the porous clay and after firing this bonding is increased by a degree of interaction of the glaze melt with the surface of the clay. Thus, any dirt, dust or oil on the bisque that even slightly prevents the glaze from soaking into the clay can cause the glaze to "lift" or "crawl" in firing, leaving unglazed spots or pin holes due to excessive gas release. Prepare bisque by wiping it with a wetted and well squeezed sponge, chamois or other non-shedding material to remove dust. Make certain your hands are clean when handling bisque. Even body oils can cause problems.
Lakeside Pottery cone 6 mid range glaze recipes
Mixing and Using Glazes
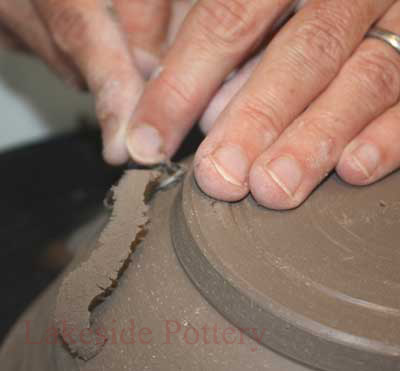
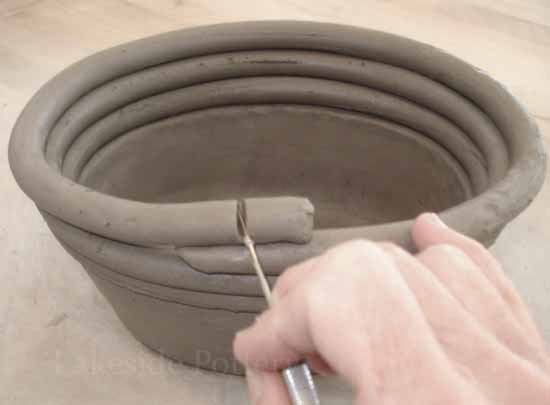
The best kind of test piece is one that will resemble the pots that you intend to glaze. One method is to dissect an entire pot into pie slice segments and use the segments as your test items. Be sure to use the same application technique (brushing, dipping, spraying or pouring) that you plan to use as well. While preparing the test piece, make notes about the consistency of the glaze. For instance, does the glaze appear to be the viscosity of milk, light cream or pancake batter. Notice how the glaze builds up on the piece - if you want to, you can scratch a line of glaze from the bisque. If for instance, the resulting furrow is the thickness of a U.S. dime, the application thickness may be too heavy. (We will examine more scientific methods of measuring viscosity and specific gravity later in this article.)
The signs that an application thickness is too heavy are many: transparent glazes may appear cloudy, rolls of glaze can run to the foot or off the pot and the glaze may crackle, peel or crawl. The main sign that a glaze is insufficiently thick is that the surface will have an pebbly orange peel texture. Generally, glazing too heavily is a common problem, glazing too lightly is not.
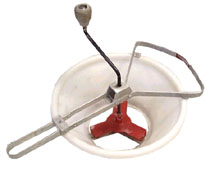
Talisman sieve |
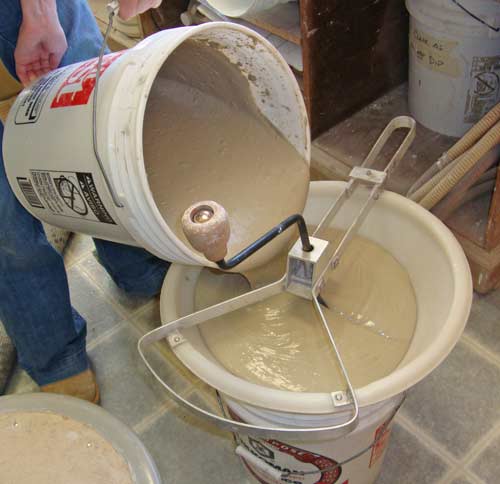
Sieving Glaze |
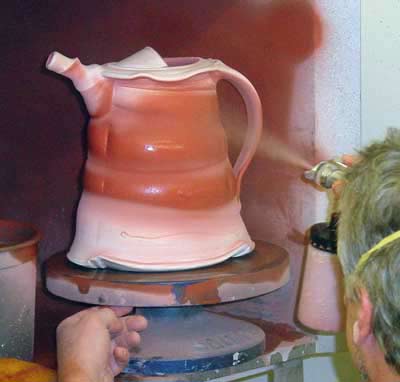
Spraying glaze |
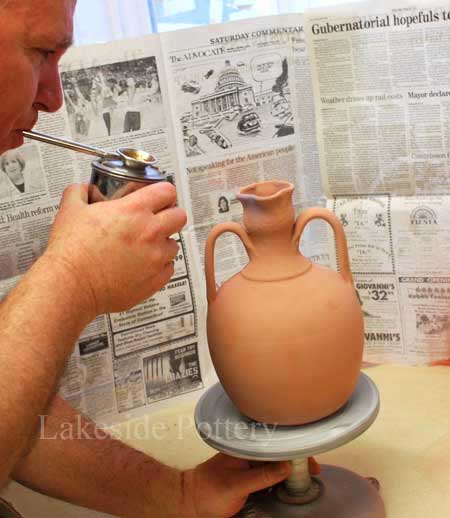
Mouse spray |
Mixing Your Glaze
Prepared liquid glaze should be poured through an 80 or 60 mesh sieve into a container to remove any lumps. Mix the glaze vigorously using a whisk or similar tool. If the glaze has been sitting idle for some time, it will likely be in a state where some of the water has separated (it will be seen to be floating on top of a denser glaze layer) and the glaze will need to be mixed thoroughly to make it homogenous. Use several test pieces to assess the thickness. Remember that is far easier to add water to a glaze than it is to attempt to remove it, so add water with care!
Powdered glazes are a little more work to prepare, but can be worth the effort because powdered glazes almost always cost less. More broadly, for powdered glazes it is important to: protect yourself from inhaling ceramic powders, preventing skin absorption of soluble materials and avoiding eye injuries caused by powders or splashes from liquid glazes. A properly fitted NIOSH certified respirator is necessary for adequate protection against ceramic dusts. Pay attention to the safety labels on ceramic materials, they will help to inform you of any other precautions you should take.
Mixing from powdered glazes can be as high or low tech as you like. However, the greater amount of agitation that you may bring to your glaze during mixing, the less lumpy the glaze will be - and that will allow it to go through a sieve more easily. If you can dedicate a blender to this task, so much the better. Just remember not use it for frozen drinks any longer! One technique that will allow you to reduce dust significantly is to add water to your powdered glaze in a water-tight heavy gauge plastic bag and mix by massaging the bag.
Measuring Specific Gravity
A hydrometer is a tool that can help you to control the consistency of your glaze. A glaze hydrometer is a glass tube with a weighted end and a scale printed vertically along its length. When inserted into the glaze slop, it will come to rest at a particular point along the scale. The resulting reading, (between 1.000 and 2.000 and normally about 1.450 for glazes) can help you to fine tune your glaze set-up and make your glaze more uniform from batch to batch. Note: It can be fairly easy to get a false reading using a hydrometer. For instance, a damp hydrometer (one with lower friction properties and greater weight) is unlikely to give you the same reading as a dry hydrometer (one that has higher friction properties and lesser weight). Make sure that you follow the same process each time you use it. Also, Springtime can bring changes to water quality and this change is sometimes reflected in the viscosity of your glazes. When this happens, hydrometer readings can stray significantly from the norm, and changes in glaze consistency will frequently occur.
If you have an accurate gram scale, there is a method of measuring specific gravity that is more reliable. It has been called: "pint weight" by potters for a long time. Pint weight is simply the measure in grams of a known volume (in this case, one pint liquid, not including the weight of the pint container) of glaze. Once you know how much a pint of glaze should weigh for proper application qualities, then that figure is used as a target weight for successive batches of glaze.
To be a little more exact, specific gravity (s.g.) is expressed as the ratio of grams (weight) per milliliter (volume). Water has a specific gravity of 1 because 100 grams of water has a volume of 100 milliliters. Since glaze contains not only water but solids as well, it will always have a specific gravity of more than one.
Follow these steps to determine the s.g. of a glaze. First, find an empty container like a 6 ounce juice can that is tall and narrow. Punch a small hole in the center of the lid. Place the container and lid on the gram scale. Use the tare bar to zero the scale to the combined weight of the lid and container. Fill the container to the brim, so that when the lid is applied, a small amount of water trickles through the hole in the top. Sponge the water on the lid away and weigh the container. The resulting weight in grams will also be the volume in milliliters. For example, if the water weighs 250 grams, the volume is 250 milliliters. Now pour the water out and dry the container and lid. Fill the container with your glaze (in a consistency that you have identified as proper for your application technique) and weigh it as you did with the water. Let's say that this weight is 350 grams. To find out the specific gravity of this glaze: divide the weight (350 grams) by the volume (250 milliliters). In this case, the resulting specific gravity is 1.4 grams per milliliter. Keep a record of this figure for future batches of this glaze.
Application Techniques - General
There are four major glazing techniques that potters use: dipping, pouring, brushing and spraying as described in more details above. The last, spraying is the least common probably because it requires a significant investment in equipment, (i.e. compressor, spray gun, dust and mist booth, filtering gear.) This is an area of glazing that requires more discussion than is possible here so our focus will be on the other three techniques.
Brushing tends to be very popular because it requires the least volume (as little as 4 ounces) of glaze. Normally three or four coats are applied to get appropriate coverage. Try to overlap coats as you work around your piece and try not to let any one area become too dry - when you apply a wet coat of glaze to a completely dry layer of glaze, you run the risk of the top layer peeling away from the pot as it dries. Brushing can be difficult to achieve an all around even application thickness, sometimes a small amount of food dye can be added to a glaze to assist in making it contrast with the clay that it is to cover.
Dipping and pouring require a more glaze (at least one quart), but the resulting even application can make the investment worthwhile. Transparent glazes generally require a thin coating, while opaque glazes normally work well applied more generously. If dipping one glaze over another, it is best to apply the second glaze before the first has completely lost its wet sheen. This will allow the two coats to dry together and help to prevent peeling. Glaze tongs work well if you want to dip a pot in one or more glazes. Be sure that the glaze is of sufficient volume to submerge your piece entirely without hitting the sides of the glaze container. Try to locate the points of the glaze tongs on an area of the piece that is both structurally strong and away from decoration. The four snake bites that the tongs leave can be dabbed with a brush loaded with the same glaze.
APPLICATION - Dipping, Spraying and brushing
Glazes meant to be brushed on often have additional ingredients to enhance their flow off the brush and the evenness of their application. Some dipping glazes need no alteration for brushing, but if they do, the following approximate additions to one pound of dry glaze will help (test first with half the addition):
Add:
10.5 to 11.5 ounces of water (basic brushing glaze formula)
4.5 to 7.5 grams bentonite
2.3 to 3.4 grams CMC gum (first dissolved in warm water and aged overnight)
Note: 2 teaspoons equals 5-6 grams
Ideally, viscosity should be 2200 to 2500 on a hydrometer
When brushing a glaze, use as large a brush as reasonable with a smaller brush for hard to reach places. Use a full brush of glaze at all times. Dip the brush in the glaze and shake it gently, just sufficiently to prevent dripping. Do not scrape the brush on the top of the bottle or there will not be sufficient glaze on the brush to flow freely. Hold the brush lightly and flow the glaze off the brush in a continuous line and never "pat" glaze on randomly (except for special effects). Smooth the glaze by brushing back and forth very lightly. Begin the next stroke where the previous stroke ended and then lightly brush back over the area where the two strokes joined, which will adequately smooth out the "joint" between the two strokes. Apply subsequent coats in the same manner but in a different direction (for example, first coat horizontally, second vertically, and third, diagonally). Wait for the previous coat to dry thoroughly before applying another coat (A matter of a few minutes, After the first coat loses its wet "sheen").
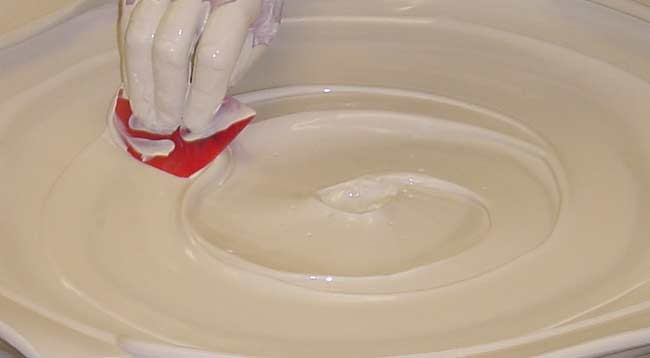
Dipping glazes should be a thick cream consistency. An old "rule of finger" is that when a clean dry finger is dipped in a mixed dipping glaze, the glaze should coat the skin evenly and bead on the finger nail. The reality is that the glaze needs to be test fired on the properly bisque-fired clay body it will be used on. It should be of such consistency that a single dip, leaving the piece in the bucket several seconds, will provide the proper glaze thickness. A general mixing formula follows (use less water first or leave aside some dry glaze to allow adjustment):
Add to 1 pound dry glaze:
6.5 to 7.5 ounces of water
0.0 to 2.3 grams bentonite (if needed to maintain suspension)
Ideally, viscosity should be 900 to 1000 on a hydrometer.
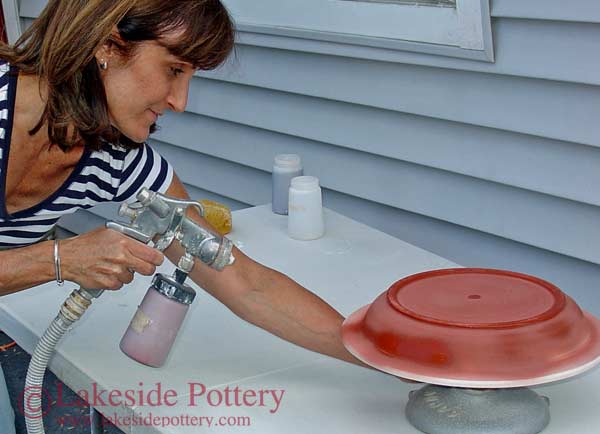
Glazes to be sprayed also require testing but the following can be used as a guide for mixing one pound of any glaze for spraying (always use a NIOSH approved mask when spraying):
Add:
7.5 to 8.5 ounces of water
0.0 to 3.4 grams of bentonite
The viscosity should be 1500 to 1700 on a hydrometer
An almost endless number of special effects can be achieved by modifying the above techniques but should be tested first. Things to try include the following, individually or in combination (test first and avoid more than the recommended number of total coats):
• Uneven application (usually less or watered down glazes unless on upper part of the piece where extra glaze won’t run off on to the shelf when fired).
• Sponging or dappling or spritzing the same glaze or another glaze on top of the coat (or second coat if brushed —on glaze)
• Overlapping a second adjoining glaze on the first color
• Strategically adding areas of underglaze over the glaze
• Using lower firing glazes (or underglazes) at higher temperatures either alone or over (or under) proper temperature glazes. Nearly all low fire (Cone 05-06) glazes and underglazes can be fired to Cone 5 or even higher but will lose some intensity (especially reds, pinks, and yellows). Be cautious though as the glazes will tend to run much more at the higher temperatures.
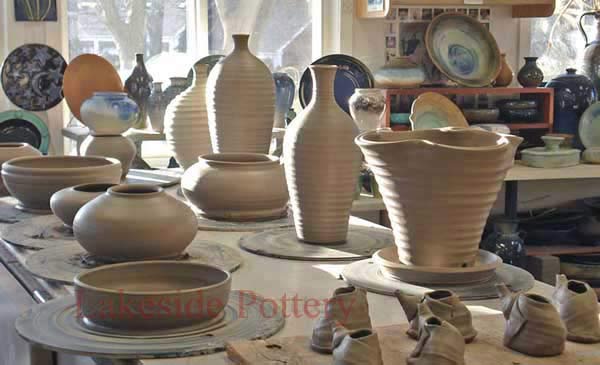
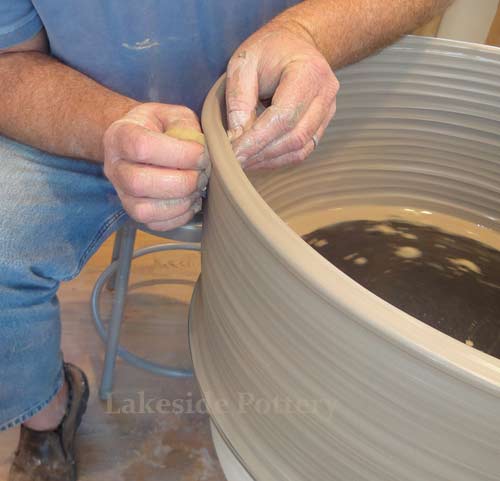
Successful glazing at Lakeside Pottery
Firing pottery / clay with glass
 Using underglazes with highfire (Cone 6)
We, at Lakeside Pottery, fire all of our and our students work to cone 6 including underglazes. We find out that it is a difficult task to find underglazes, combined with the right clear glaze, that will work properly (most blister, fade or change color). After of numerous tests and using the findings for years, we are satisfied with the results. We test all the available underglazes manufactures and came with a set of all underglaze colors (see table below) that work at Cone 6. However, the only clear glaze that gave us consistent results is Amaco's Sahara HF-9 clear glaze.
| Duncan |
Amaco |
Amaco |
Coyote |
CC – 101 White
CC – 109 Sunset Pink
CC – 117 Walnut Brown
CC – 121 Temple Grey
CC – 129 Forest Green
CC – 137 Regency Purple
CC – 146 Purple
CC – 150 Medium Green
CC – 159 Bright Blue
CC – 164 Ice Grey
CC – 171 Butterscotch
CC – 174 Kentucky Blue Grass
CC – 182 Watermelon
CC – 185 Apricot
|
V – 308 Yellow
V – 320 Lavender
V – 326 Medium Blue
V – 327 Turquoise
V – 343 Chartreuse
V – 345 Light Green
V – 380 Violet
V – 381 Amethyst
V – 382 Red
V – 384 Real Orange
|
LUG – 1 Black
LUG – 20 Light Blue
LUG – 22 Dark Blue
LUG – 42 Blue Green
LUG – 43 Dark Green
|
UG-11 Pink Underglaze
|